SSH into NextCloudPi Without a Password
I recently set up a NextCloudPi (NCP) server on my Raspberry Pi to use on my LAN. Initially, I used a monitor to configure NextCloudPi. However, as this setup is now sitting on a shelf several feet from my desk, I set up SSH to allow me to connect remotely from my main PC.
I wanted to remove the password requirement everytime I SSHed in. Here’s how.
Part 1 - Enabling SSH on NextCloudPi
Part 2 - Setting Up SSH Without Requiring a Password on NextCloudPi
Enable SSH on NextCloudPi
- Open the NextCloudPi Configuration Tool
sudo ncp-config
-
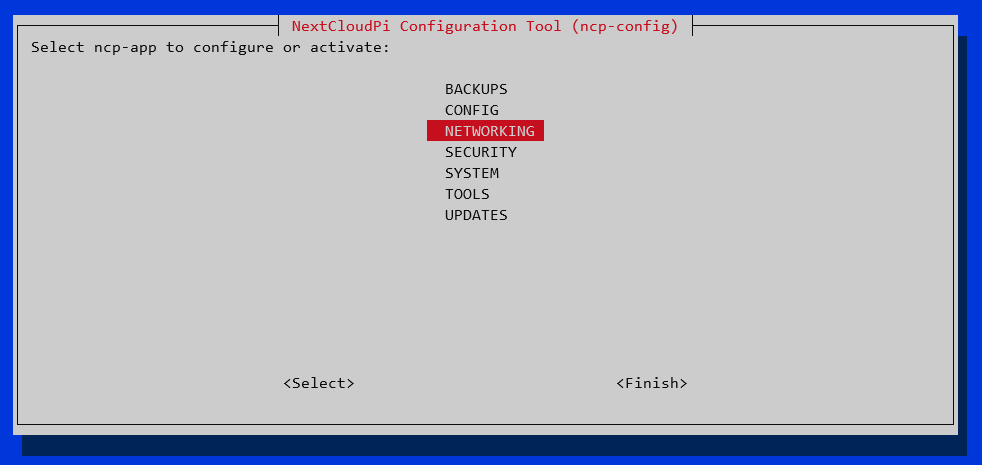
From the NCP main menu, select Networking
-
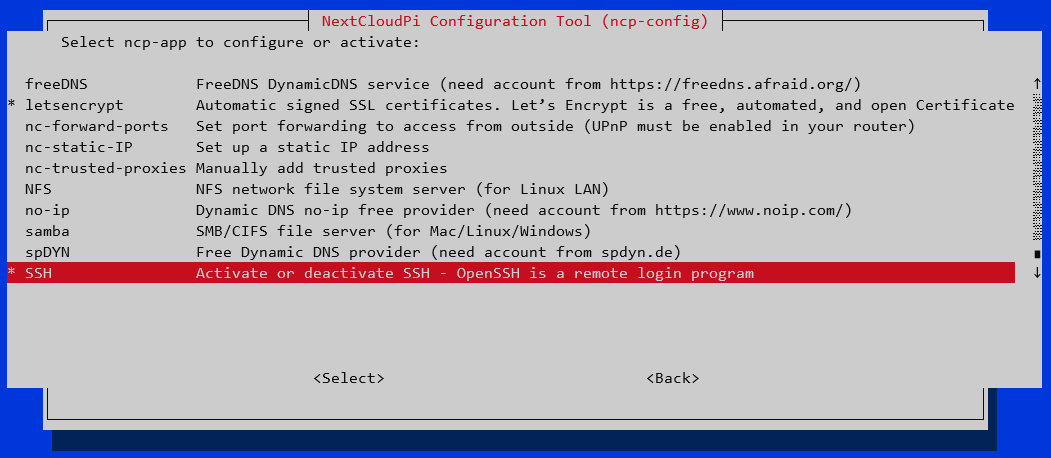
From the Networking menu select SSH. You will be prompted to confirm that you understand that the default password has to be updated from Raspberry to something else using AlphaNumerics and . , @ - _ /
-
Create a password for the “pi” user that follows the requirements in step 3 above.
Note I am using the the default “pi” user in step 3. You will need to use specify a user when attempting to SSH in the next step.
-
Reboot you NCP.
sudo reboot
- Now open a Windows10 PowerShell window. You can SSH into the NextCloudPi server by using the following: username@local_ip_address. For Example:
ssh pi@XXX.XXX.XXX.XXX
- username is the same from step XXX about
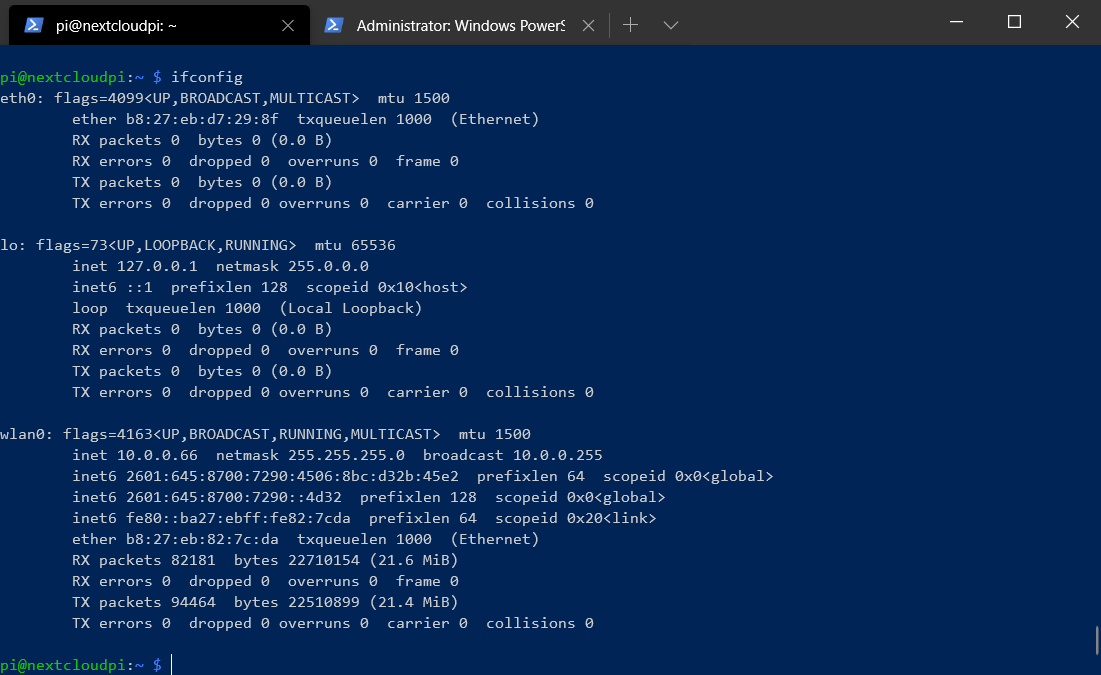
- XXX.XXX.XXX.XXX is your NextCloudPi server’s IP Address. You can find that by running the following command on your NCP. I am connected via wifi, so I use the wlan0 adapter.
ifconfig
- Note: older versions of windows will require an SSH tool such as Putty
- so all together
ssh pi@10.0.0.66
-
At which point I am prompted for the password.
-
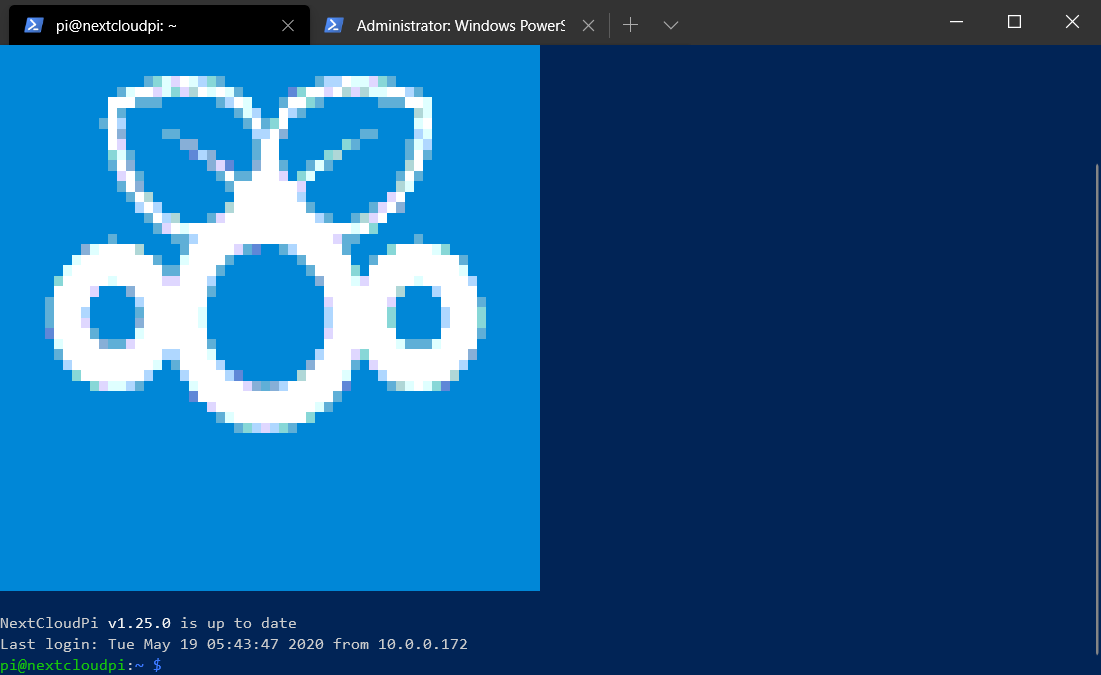
Typing in the password from step XXXX above, I am met with the NCP welcome screen.
However, what if you wish to avoid having to type a password each time you login, see part 2 below.
Part 2 - Setting Up SSH Without Requiring a Password on NextCloudPi (SSH Keypairs on NextCloudPi)
I typed my SSH password about 10 times before it started getting old. I’m hoping this helps another NCP tinkerer.
To allow for a passwordless SSH into the NextCloudPi server, one needs to create create certificates on the PC that will be remoting into the NCP (I’ll call this the main PC) and then place the public key (.pub file) contents on the NCP server.
The steps below outline this process:
- In Powershell (win key + r then type “powershell") on Windows 10, type the following command:
ssh-keygen -t rsa
-
Press Enter when you are asked where to save the key. We will save to the default location with the default name.
-
Press Enter twice when asked where to save the key.
You can optionally add a passphrase to the key. Note that I did NOT want to have to type each time I SSHed into the NCP server, so I opted to leave this blank.
Avoiding passphrases will also help in automated processes.
This is less secure as noted here and it’s well said in the comment’s:
I just want to note that passphrases are used to encrypt your private key, so if you don’t use a passphrase, then your private key will be unencrypted on your machine. It’s like leaving a password in a text file laying around on your computer.
Ultimately - it’s your call.
-
At the command line, type the following command:
more .ssh/id_rsa.pub
This will display the RSA public key you need to copy to your NCP.
-
Select ALL the text listed in the file and copy it.
Note: This should include your main PC’s username and computer name at end of the key.
-
From the PC you ran shh-keygen on, log in to your NextCloudPi using SSH and the password created in Part 1 - Step 4 above. At the command line, type the following command, replacing username wih your NCP username, and XXX.XXX.XXX.XXX with your IP Address:
ssh username@XXX.XXX.XXX.XXX
- One in your NextCloudPi server, type the following commands:
mkdir ~/.ssh
nano ~/.ssh/authorized_keys
This will open a nano text editor.
-
In the nano text editor, paste the public key text that you copied in step 5.
This file will contain the list of public keys for your remote clients to authenticate with via SSH.
If you have already set up a keypair the authorized_key file will not be empty. Append the new public key text below the existing key on a new line. Avoid deleting the existing key information if you wish to continue to have access from those clients.
-
Press Ctrl+x, type y to save the file, and then press Enter. Nano saves the file and exits.
-
At the command line on your NCP, type the following commands to set the correct file permissions for the authorized_keys file you just created:
chmod 600 ~/.ssh/authorized_keys
chmod 700 ~/.ssh
-
To close the connection, type exit and then press Enter. You are now back in your main pc’s terminal.
At this point, you have created the SSH key pair and deployed the client’s public key to the NCP server. You are now ready to connect to your NCP SSH account using the private key.
-
At the command prompt, type the following command. Replace username with your username from Part 1 - Step 4, and replace XXX.XXX.XXX.XXX with your NCP’s ip address:
ssh username@XXX.XXX.XXX.XXX
The SSH client should connect without asking you to type your account password. If you set a passphrase for the key, however, you must type the key passphrase.
When you are connected, the remote server's command line prompt appears:
pi@nextcloudpi:~ $
You can now run commands on the remote NCP. For example, to enter the NCP Configuration Tool on your NCP
sudo ncp-config
- To close the SSH connection when you are done, type exit and then press Enter.
Troubleshooting:
If you are having issues in Step 12, consider adding the -v flag to your command to see the verbose feedback from the SSH connection atttempt.
ssh -v username@XXX.XXX.XXX.XXX
This site is a participant in the Amazon Services LLC Associates Program, an affiliate advertising program designed to provide a means for sites to earn advertising fees by advertising and linking to Amazon.com.